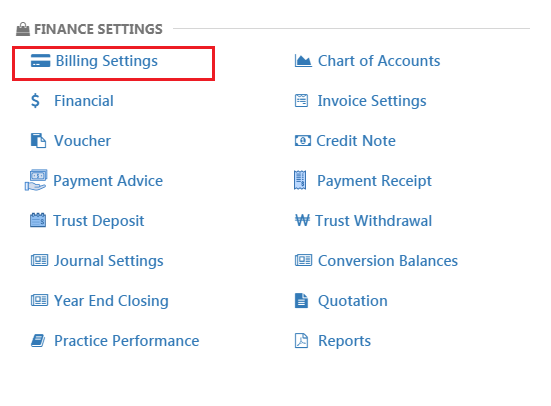
Billing Settings
Billing Settings lets one to create invoices based on the details provided. Click Billing Settings under Settings -> Finance Settings to set up information about the payment involved.
Choose the Default Currency as per your preference and the currency symbol will be substituted wherever your currency is involved in the matter.
There are other billing options to choose such as the Grace Period, Primary and Secondary Tax details, whether the taxes are applicable or not and if so how much the pre-tax or the post-tax is.
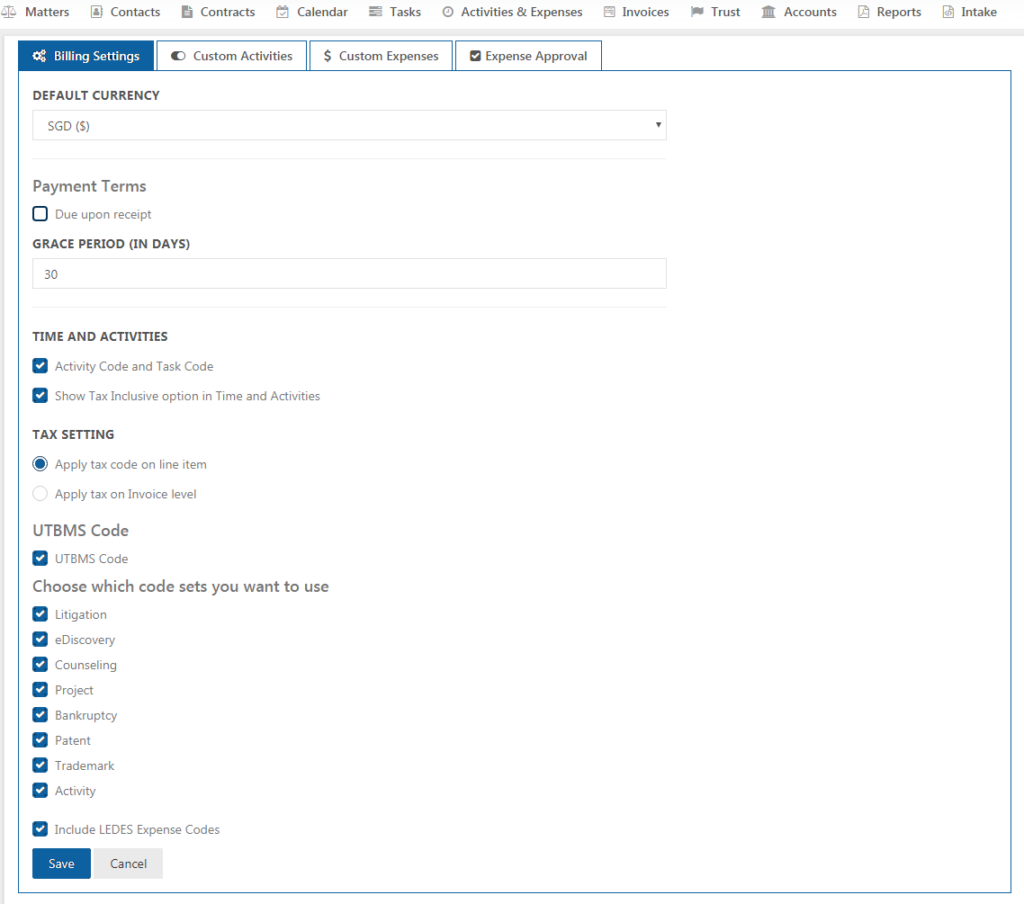
UTBMS Code
The goal of the UTBMS (Uniform Task-Based Management System) codes is to standardize the classification of the many sub-tasks in complex legal matters for e-billing. This would enable clients to collect data on exactly how much they were being charged for each legal sub-task, and ultimately to manage those costs. This is helpful in loading Time Entries for each task as well. The invoices are promptly processed containing the corresponding task description and the UTBMS code for each task performed.
Custom Activities
This tab helps to create or customize activities.
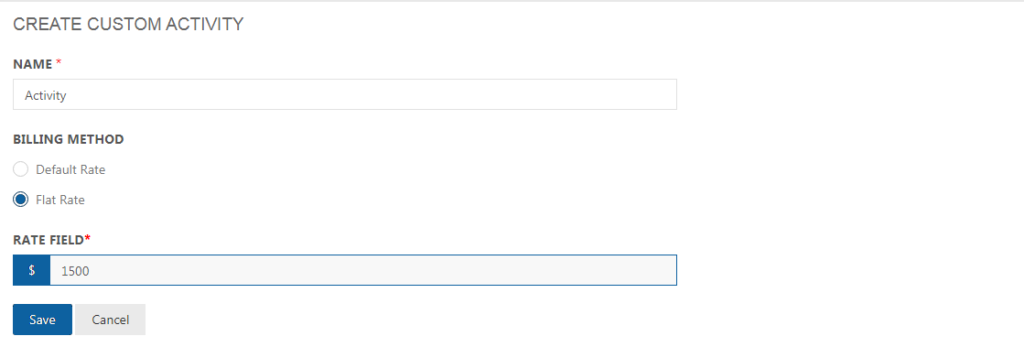
To create a new custom activity, click Add button on the left.
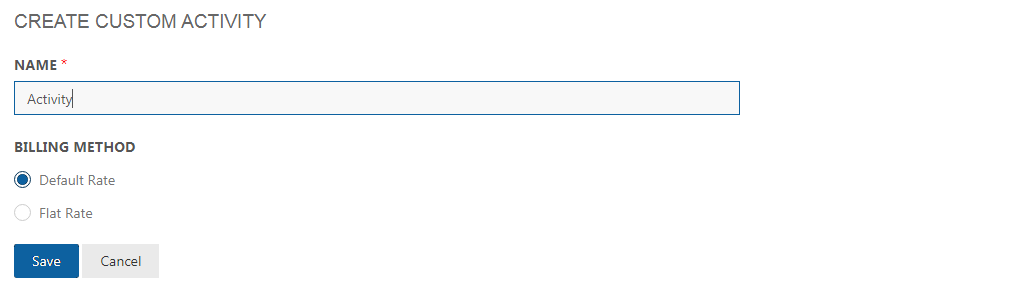
Provide a name for the activity and select between Default Rate and Flat Rate. If default rate is selected, it gets the rate filled for the user in User Settings and if Flat Rate is selected, it prompts to enter the rate in Rate field as shown below. Click Save once done.
Custom Expenses
Custom Expenses is present in the Billing Setting.
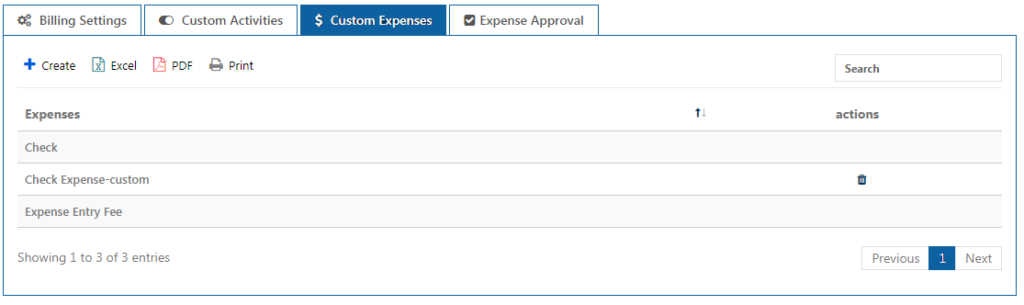
Through custom expenses, own expenses can be created. In the Custom Expenses tab, click on the ‘Add’ button. Enter the Expense Description and click ‘Save’.

Expense Approval
The Expense Approval tab is the fourth tab under Billing Settings.
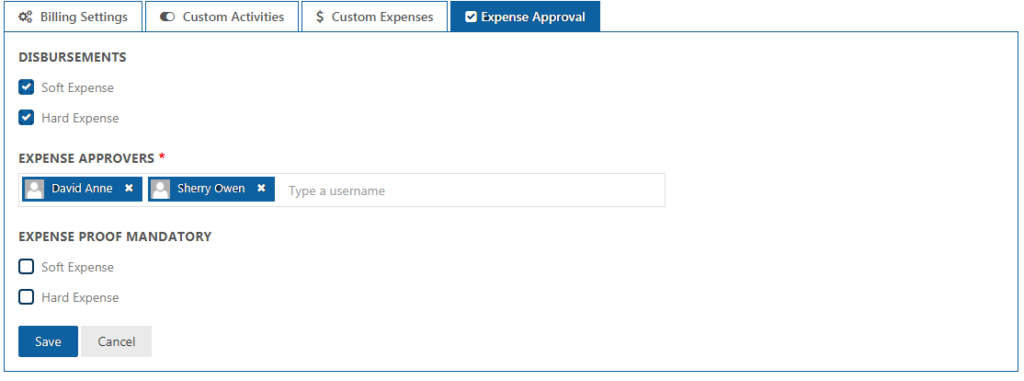
When a particular expense is selected, Soft Expense or Hard Expense, the Expense Approvers have to be mentioned.
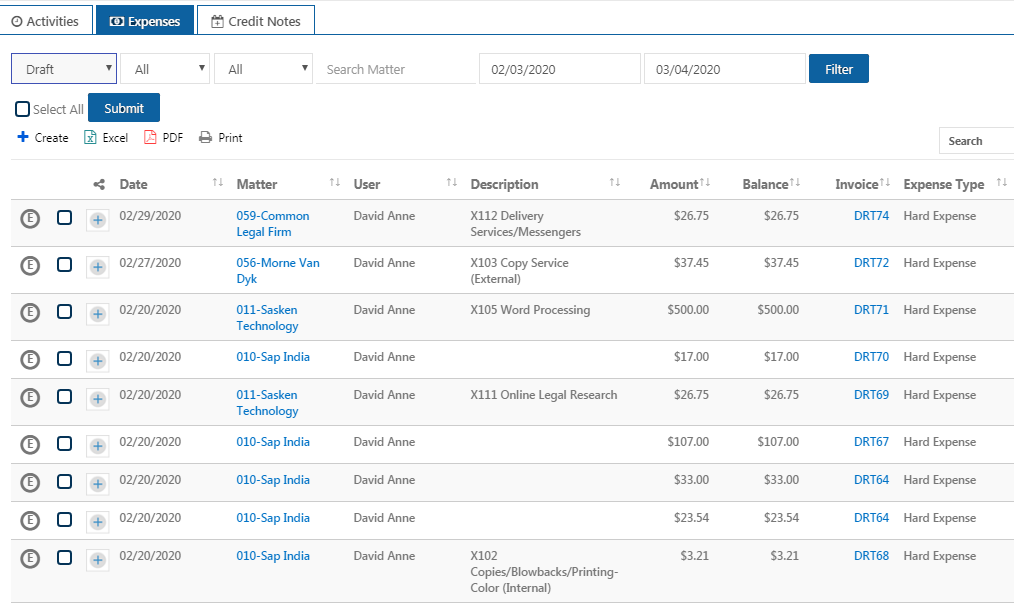
In Activities & Expenses, once the Submit button is clicked, the Expense goes to the Approver’s page waiting for approval.
When the approval is done, in the Actions column, click on the eye symbol to view the expense. The filter option in Expenses Tab, helps to filter out all the approved expenses.
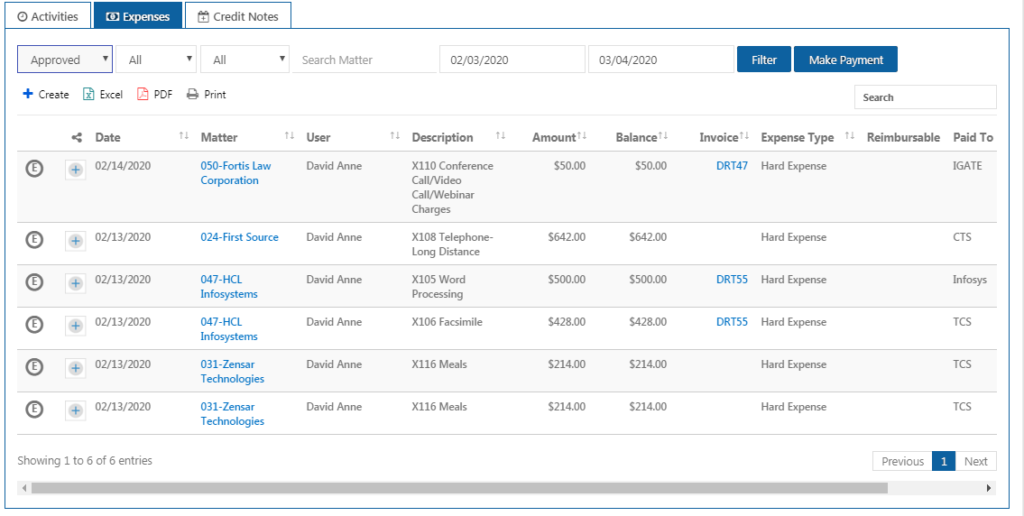
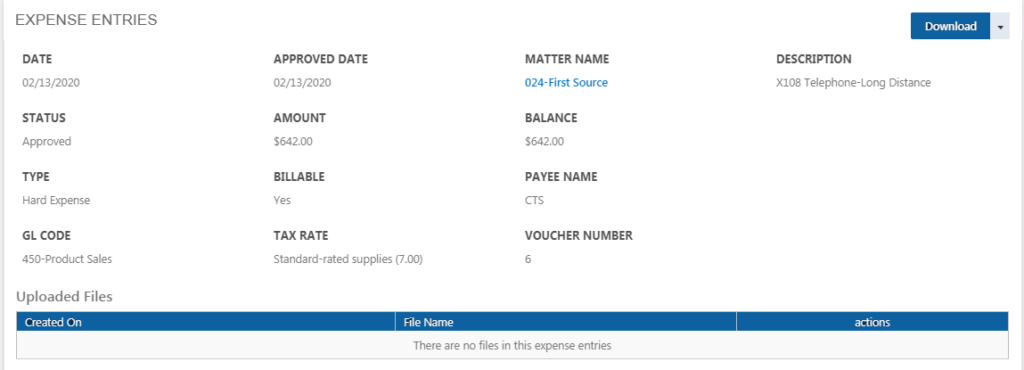
The Expense can be downloaded as pdf or printed. But the payment for the expense can be made through the Office Account only.
In the Expense Proof Mandatory field, if hard or soft expense is checked, then the proof for these expenses must be uploaded.