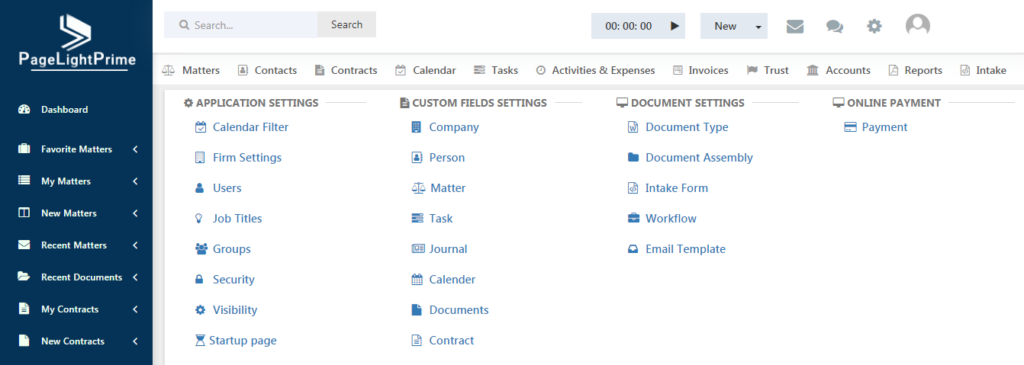
Document Assembly
Goto Settings and click on the “Document Assembly”
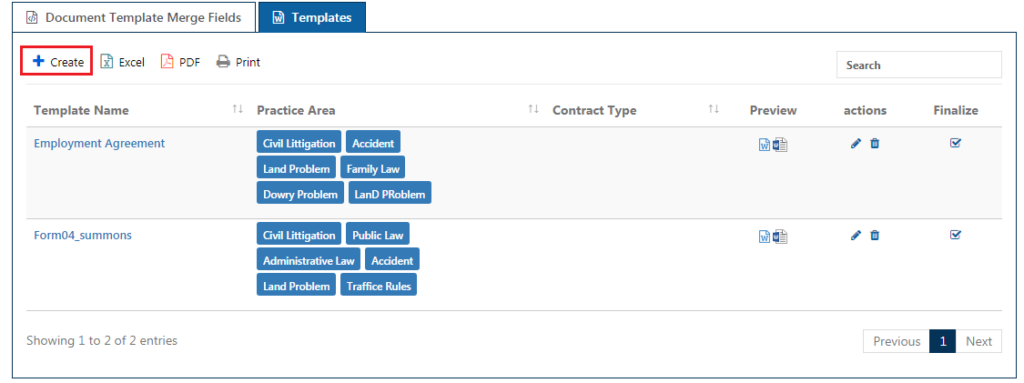
A page like the below appears. Click on the “Templates”

The list of already created templates is appeared in the page. You can make use of one of these templates or create a new template. To do this, click on the ‘Add Document Template’ button on the right.
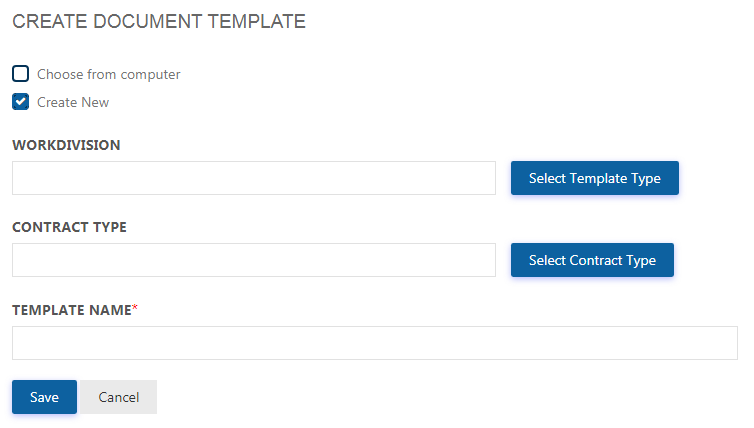
You can either choose a template from the computer or create a new template. Click on the respective check box. When you click on Create New check box, enter a template name and give ‘Save’.
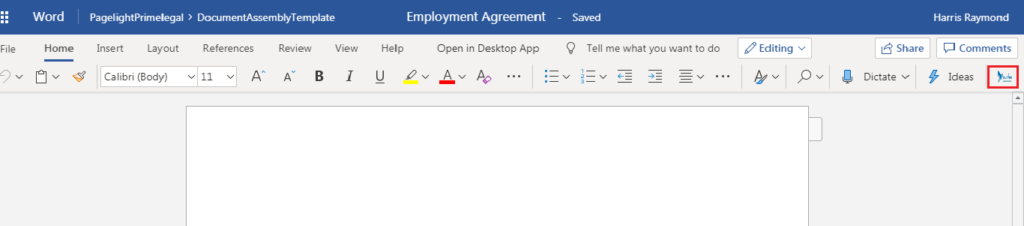
A word document opens online. Click on the ‘PageLightPrime Docs’ icon on the right corner.
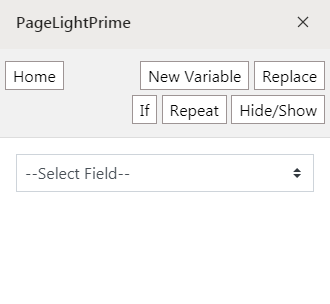
Clicking on the button leads to a window like this on the right.
Click on the ‘New Variable’ button.
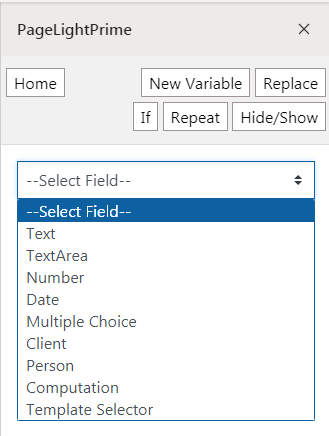
There are various fields available in PageLightPrime such as Text, Text Area, Number, Date, Multiple Choice and Computation.
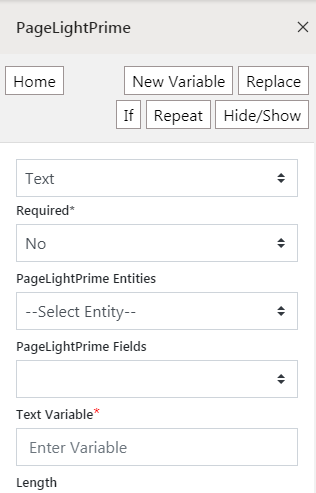
Text
Selecting text field opens up a new set of options to be filled such as the field name, length, default value,text message, the prompt message and so on.
Text Area and Date fields works in the similar way with different options.
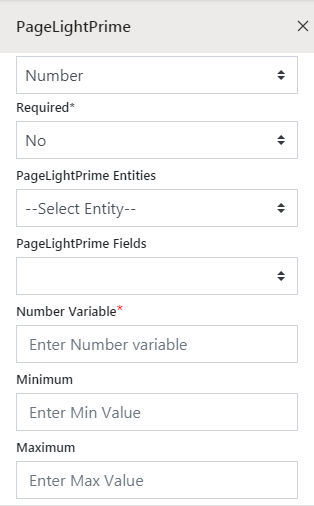
Number
Selecting Number field opens up a new set of options to be filled such as the field name, minimum length and maximum length of the number, number value, currency type, default value, prompt message and so on.
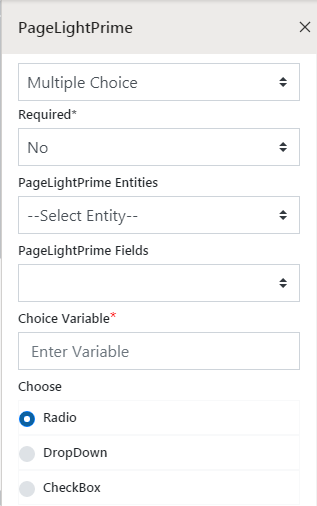
Multiple Choice
Selecting multiple choice field gives option to choose between Radio button/ Drop down or check box.
Computation
Computation is one among the fields that PageLightPrime provides to perform any sort of computation with number variables or text variables.
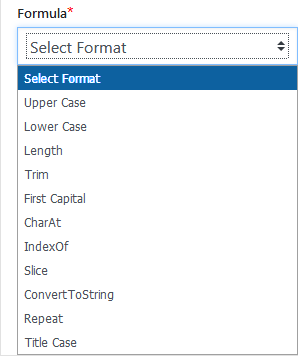
There are a large number of options available for computation based on the field type. If it is a text variable the below computation options are provided.
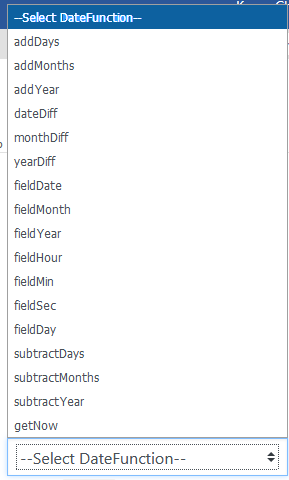
If it is a date variable the below options are all available for computation.
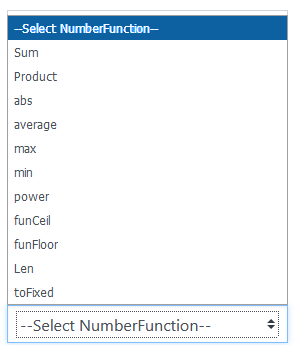
For a number variable, the below functions are available to perform the computation.
Now let’s understand the concept of Computation better through an example.
Create a template with two number variables Number 1 and Number 2. Now choose the field as computation and create a computation variable (say addition).
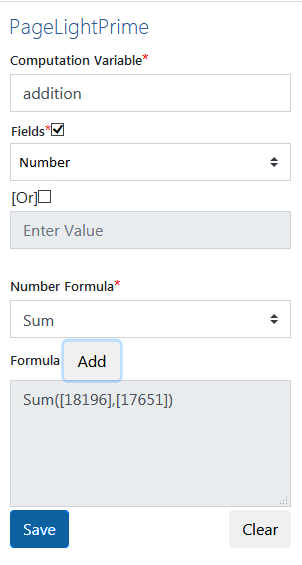
While creating the computation variable, a number of formulae appear in the Number formula drop down box. Select the field(Num 1) from the list of available fields and choose the formula you want to perform. After selecting the first field and choosing the formula (Sum in this case), select the second field(Num 2) and click Add button. Click ‘Save’ once done.
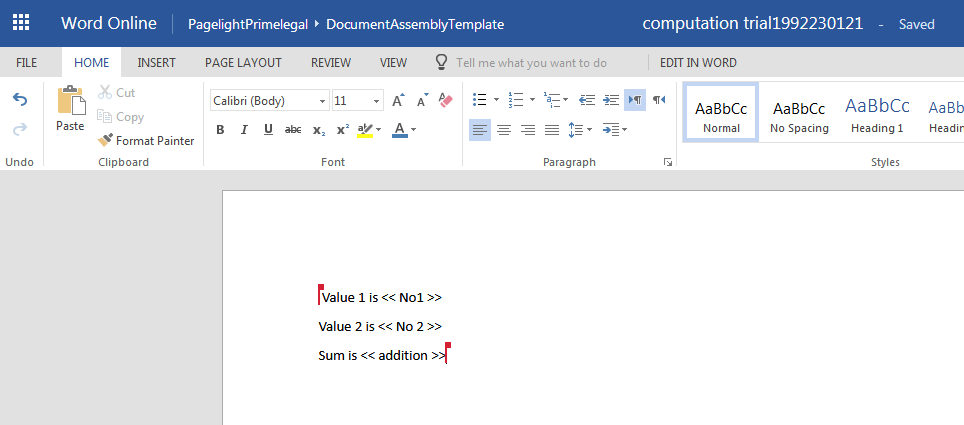
Now go to the replace tab and insert the variables you want to see in the output screen.
Click the ‘Finalise’ button after making all desired changes to the template.
Go to Matters tab and choose any matter of your choice and create a New Document under the Prima Documents tab. Select the template in which you have applied the computation formula.
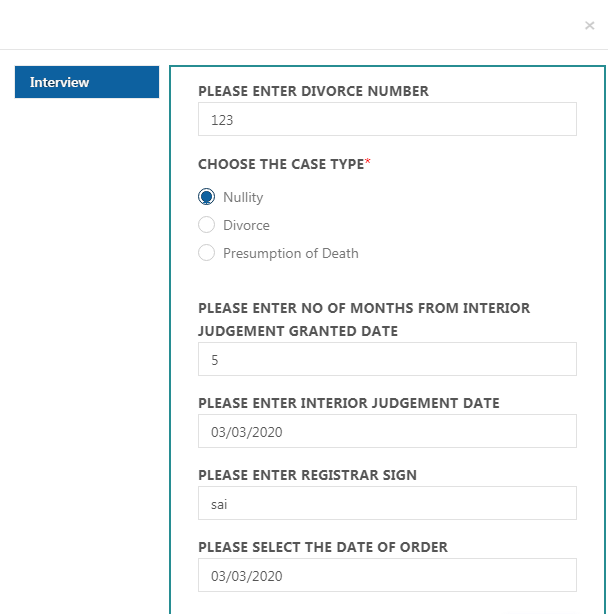
A page like the below appears prompting for values.
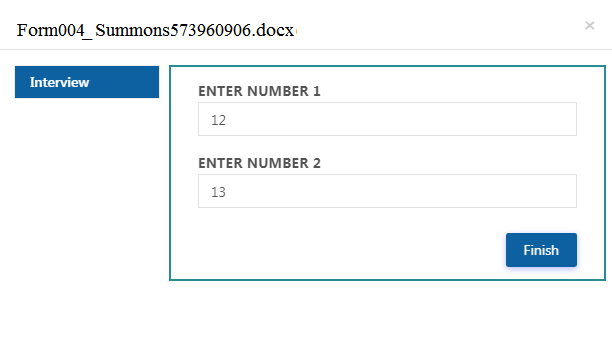
Enter the values and click ‘Finish’.
Once done, go to Prima documents page and click the preview button. An online document opens with the computation being applied!
The output screen looks like the below with the two numbers and it’s sum.

Select the PageLightPrime field and give it a variable name and click ‘Save’. The next step is to replace the created field in the document in the desired format.
Replacing PageLightPrime Variables
Click on the ‘Replace’ button next to New Variable button. A screen like the below appears.
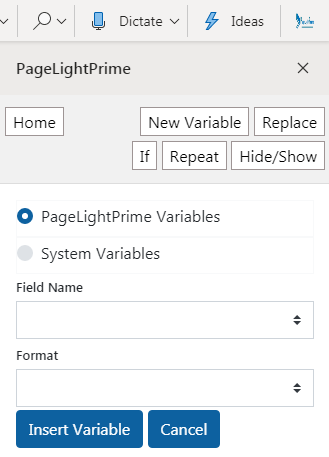
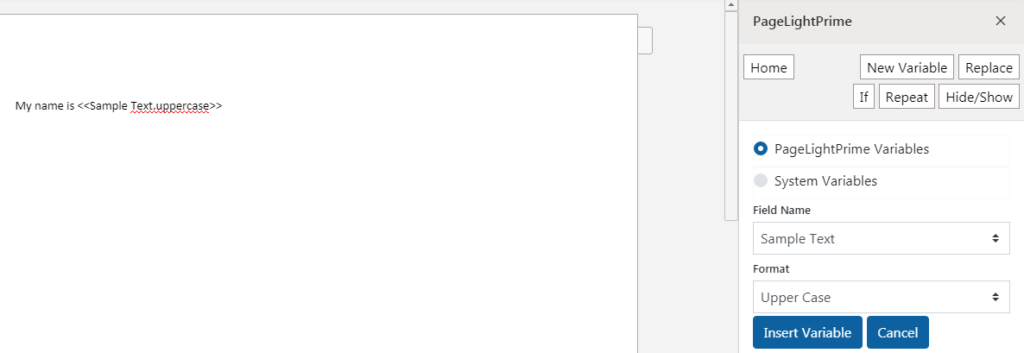
Select the Field name you want to replace. Choose the desired format and click ‘Insert Variable’ button. You will be able to find that the variable name and the format will be displayed on the left screen within brackets which will be replaced with the value later.
Similarly add any number of fields to your document and insert the ones you want to be replaced.
Once done, go to Document Assembly page and under the templates tab, you will be able to find the newly created Template. Click on the ‘Finalise’ button on the right of the template name and click Save. Please note that, unless the template is finalised, the changes will not be reflected in the document.
Once finalised, click on the ‘Matters’ tab and selected the desired matter. Click on Case details and select ‘Prima Documents’.
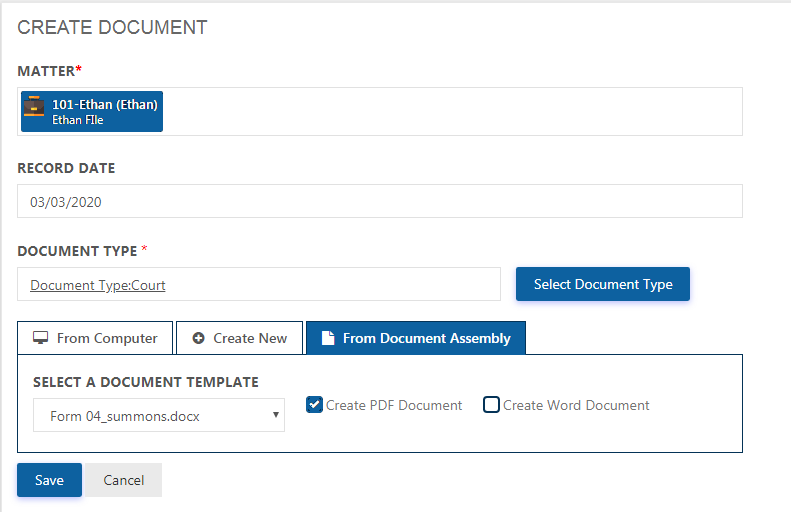
Click ‘Create Document’ button on the right. The case number appears automatically through the selected Matter. Enter the Document name and choose the required Document Type. Choose ‘From Document Assembly’ tab and select a document template from the list of available document templates. Choose to create a PDF Document or a Word Document. Click ‘Save’ once done.
Once Save button is pressed, the form opens on the right and the clients are prompted to enter the various details as listed in the template. Please be aware that these values will be validated based on the PageLightPrime variables selected and the options set for each variable.
Click ‘Finish’ after entering all the values for the fields. You can now goto Prima Documents and review the created document. You will be able to find that the variable chosen previously in the ‘Replace’ tab will be replaced in the expected format.
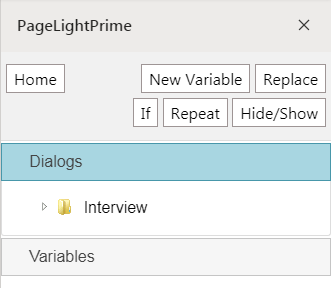
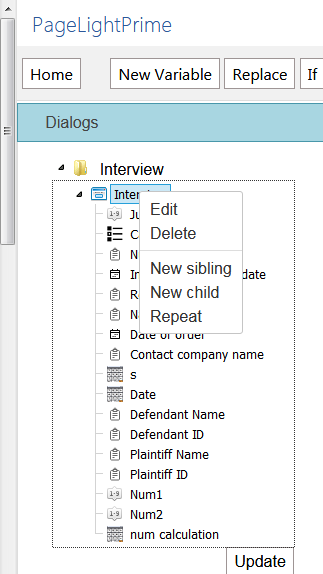
In the Document Assembly template, at first all the variables created in the template will be listed under the default dialogs under the Interview Folder like in the picture shown below.

Nevertheless, PageLightPrime gives you options to add new siblings or child as per the requirement. To do this, right click on the Interview tab and select New Sibling or any other option as per your needs.
After selecting ‘New Sibling’, enter a relevant name for the sibling and a new sibling will be created. You can move the variables by drag and drop method into the other siblings. Click the ‘update’ button to save your changes. Creating new siblings helps to group the fields appropriately. Remember to ‘finalise’ the template after making any change.
To check the newly made changes, go to Document Assembly and create a new document. Use the updated template’s name in ‘From Document Assembly’. Once you click ‘Save’, you will be able to note that the Form window will have 2 buttons, for the two siblings.
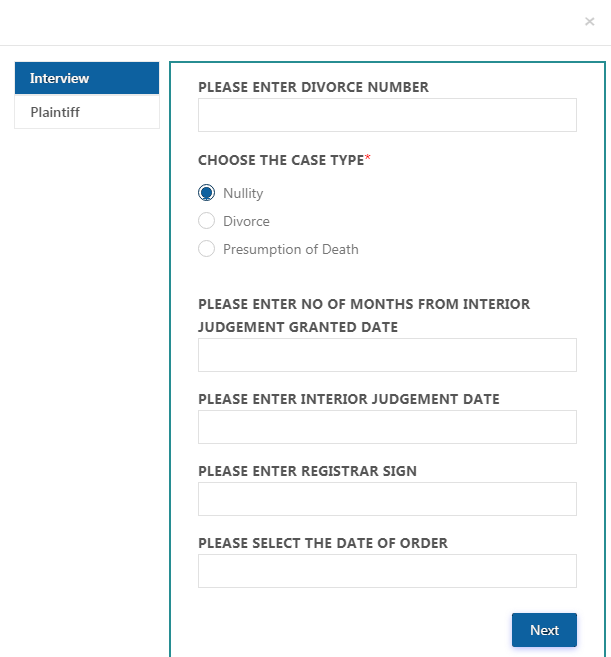
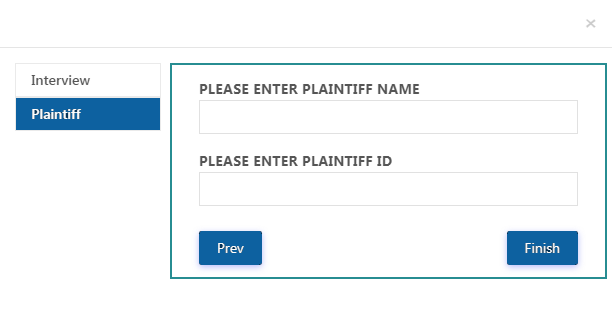
Clicking on each button will open the relevant fields that were previously grouped into the respective sibling and lets you to fill values. Click ‘Finish’ once done.
After filling the values in the form, go to Prima Documents and click ‘Preview’ on the Document Name. The updated document in the expected format as mentioned in the ‘Replace Variable’ option appears on the screen.
